
How to Record a FaceTime Call on iPhone and Mac

When you are using FaceTime to call someone. Then you are talking with your friend or family member on that section you need to record the call. Some important talk you need to record but you don’t know the way that you can record. But don’t worry I am here to solve your problem. iPhone settings have a great feature for recording. If you want to record a FaceTime call on your iPhone then you need to read this article. So, without wasting any time let’s get has started. From this article, you will learn How to Record a FaceTime Call on iPhone and Mac.
Related Post: How to Remove Camera on iPhone From the Lock Screen
How to Record a FaceTime Call on iPhone
Step 1 First of all, open the Settings on your device after that scroll down then click on the Control Centre.
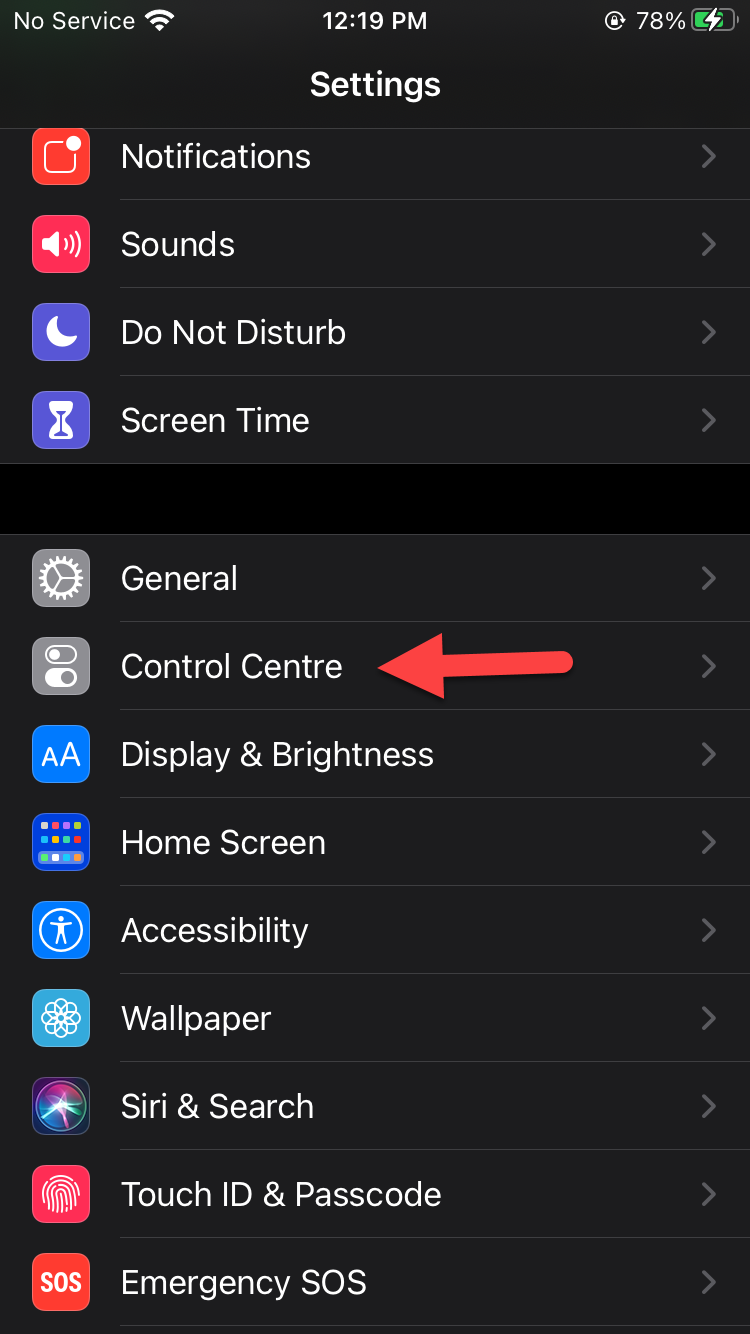 Click on the Control Centre
 Step 2. When the control center is open then scroll down you need to find Screen Recording once you find that simply click on the Plus icon.
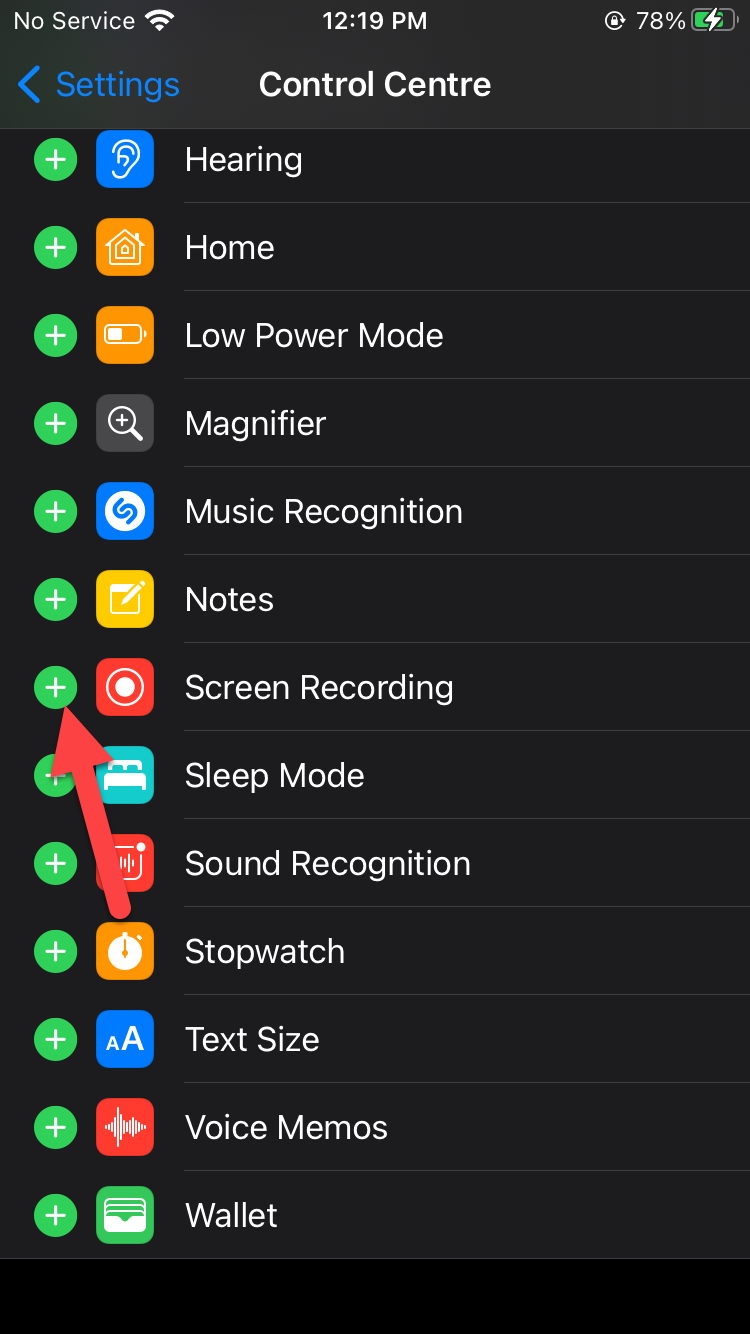 Click on the Plus Icon
 Step 3. Now, call someone on your FaceTime.
Step 4. To record the call of someone you need to Swipe Up to open the control center.
Ste 5. Once the control center is open then you need to simply click on the Recording Icon at the bottom left corner.
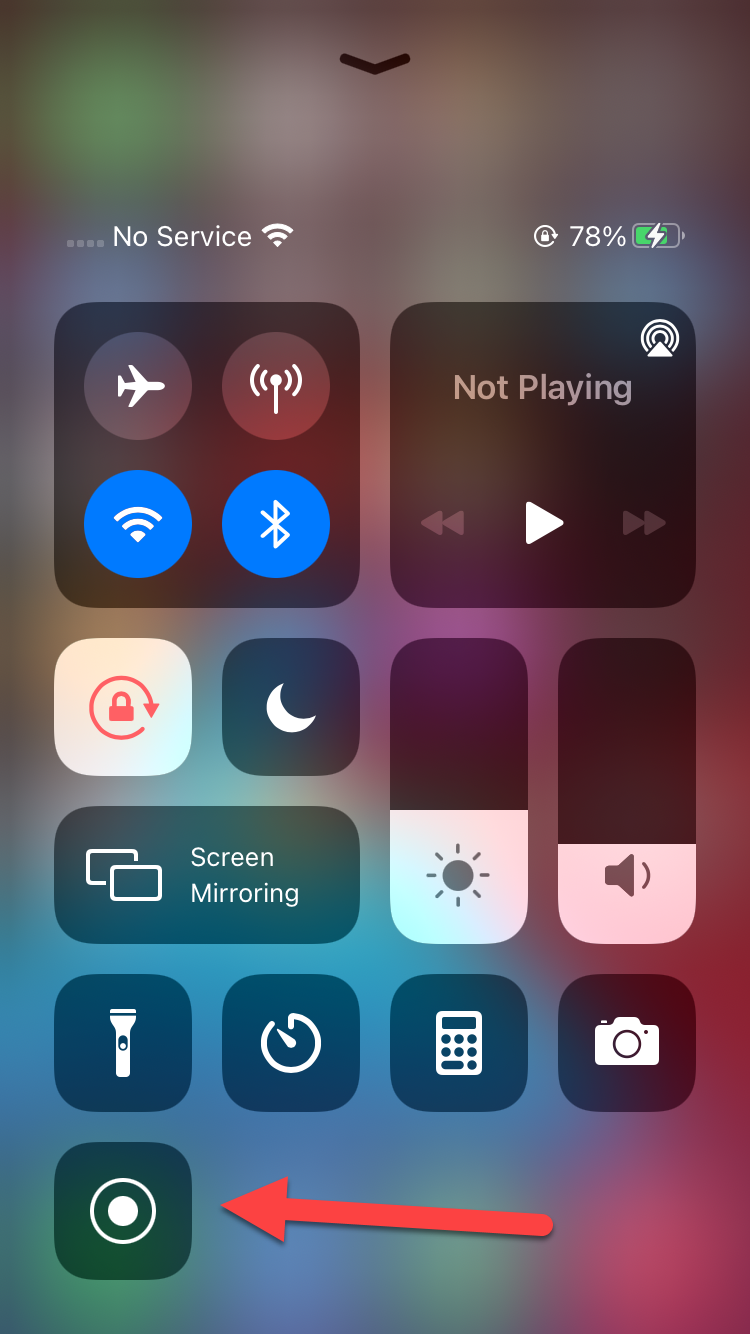 Click on the Recording Icon
 Step 6. If you want to stop the recording then swipe up after that click on the Recording Icon at the bottom left corner.
Step 7. However, when you stop the recording then it will save to your Photo section.
How to Record a FaceTime Call on Mac
Step 1. At first, you need to connect your iPhone with Mac with Lighting Cable.
Step 2. Press Command + Space Bar then type on the search bar QuickTime after that launch it.
Step 3. When the QuickTime is open the tap on the File from the menu after that click on the New Movie Recording.
Step 4. Tap on the Downward Arrow.
Step 5. Now, choose the iPhone.
Step 6. Don’t forget the main thing you need to fill the volume.
Step 7. Moreover, tap on the Recording Icon and fill the volume.
Step 8. When you click on the recording icon the call someone.
Step 9. If you want to stop the recording then tap on the Recording Icon.
Related Post: 5 Best Mice for Mac Users in 2021
Bottom Line
It was all about How to Record a FaceTime Call on iPhone and Mac. I hope this article is very helpful for you to record a FaceTime. From this article, you will get something good. This is the right place to solve your problem. After following these steps I hope you will not face any kind of problem. If you faced any kind of problem and if you have any type of suggestions then do comment.
Related Post: How to Download and Install Binance App on Windows
Share This Article
When you are using FaceTime to call someone. Then you are talking with your friend or family member on that section you need to record the call. Some important talk you need to record but you don’t know the way that you can record. But don’t worry I am here to solve your problem. iPhone settings have a great feature for recording. If you want to record a FaceTime call on your iPhone then you need to read this article. So, without wasting any time let’s get has started. From this article, you will learn How to Record a FaceTime Call on iPhone and Mac.
Related Post: How to Remove Camera on iPhone From the Lock Screen
How to Record a FaceTime Call on iPhone
Step 1 First of all, open the Settings on your device after that scroll down then click on the Control Centre.
Click on the Control Centre Step 2. When the control center is open then scroll down you need to find Screen Recording once you find that simply click on the Plus icon.
Click on the Plus Icon Step 3. Now, call someone on your FaceTime.
Step 4. To record the call of someone you need to Swipe Up to open the control center.
Ste 5. Once the control center is open then you need to simply click on the Recording Icon at the bottom left corner.
Click on the Recording Icon Step 6. If you want to stop the recording then swipe up after that click on the Recording Icon at the bottom left corner.
Step 7. However, when you stop the recording then it will save to your Photo section.
How to Record a FaceTime Call on Mac
Step 1. At first, you need to connect your iPhone with Mac with Lighting Cable.
Step 2. Press Command + Space Bar then type on the search bar QuickTime after that launch it.
Step 3. When the QuickTime is open the tap on the File from the menu after that click on the New Movie Recording.
Step 4. Tap on the Downward Arrow.
Step 5. Now, choose the iPhone.
Step 6. Don’t forget the main thing you need to fill the volume.
Step 7. Moreover, tap on the Recording Icon and fill the volume.
Step 8. When you click on the recording icon the call someone.
Step 9. If you want to stop the recording then tap on the Recording Icon.
Related Post: 5 Best Mice for Mac Users in 2021
Bottom Line
It was all about How to Record a FaceTime Call on iPhone and Mac. I hope this article is very helpful for you to record a FaceTime. From this article, you will get something good. This is the right place to solve your problem. After following these steps I hope you will not face any kind of problem. If you faced any kind of problem and if you have any type of suggestions then do comment.
Related Post: How to Download and Install Binance App on Windows